A comfortable bike seat is not just a luxury—it’s a necessity for any avid cyclist. Whether you’re navigating city streets on your way to work, enjoying a leisurely ride in the park, or pushing yourself to the limits in a triathlon, the right bike seat can make all the difference. A poorly fitted or worn-out seat can turn even the most enjoyable ride into a torturous ordeal.
Recognizing the importance of a good bike seat, this guide is all about helping you upgrade your cycling experience. We’ll provide you with a detailed, step-by-step process to install a new bike seat—a simple yet effective way to enhance your comfort and performance on two wheels. Let’s get started and transform your rides into smooth and enjoyable journeys!
What Tools Do You Need?
Before diving into the installation process, it’s super important to gather the right tools. Fortunately, installing a bike seat is a relatively straightforward task that doesn’t require an extensive toolkit. Here’s what you’ll need:
- Wrench or Allen Key: Most modern bikes use seatpost clamps that are secured with either bolts or nuts. You’ll need an appropriately sized wrench or Allen key to loosen and tighten these. The exact size varies, but common sizes include 4mm, 5mm, or 6mm Allen keys. Always check your bike’s specifications to ensure you have the right size.
- Grease (Optional): A bit of grease can be helpful, especially if you’re working with a metal seatpost. Grease helps to prevent seizing and makes future adjustments or removals easier. If your bike has a carbon seatpost or frame, you’ll want to use carbon assembly paste instead of regular grease to prevent slippage without over-tightening.
With these tools in hand, you’re ready to begin the process of removing your old bike seat and installing the new one.
Removing Your Old Bike Seat

The first step in installing your new bike seat is to remove the old one. This process is generally simple and quick. Follow these steps:
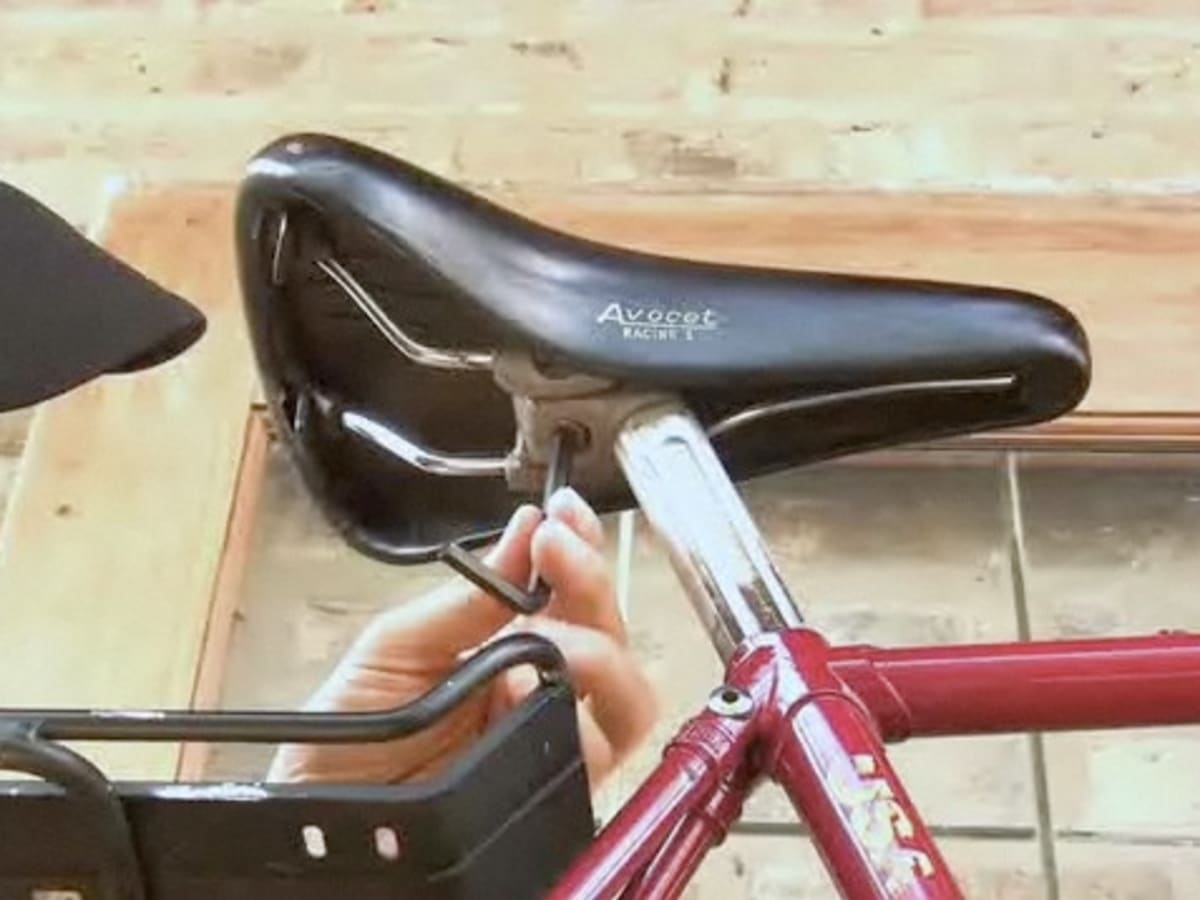
- Locate the Seatpost Clamp: The seatpost clamp is what secures your bike seat to the seatpost. It’s typically located at the top of the seatpost, where it meets the seat. The clamp might have one or two bolts, depending on the design.
- Loosen the Bolts: Using your wrench or Allen key, loosen the bolts on the seatpost clamp. You don’t need to remove the bolts entirely—just loosen them enough to free the seat. If the bolts are particularly tight or haven’t been moved in a while, it might require a bit of extra force. Be careful not to strip the bolt heads.
- Remove the Seat: Once the bolts are loosened, you should be able to slide the old bike seat off the seatpost. If it’s been in place for a long time, it might require a gentle wiggle to free it.
- Clean the Seatpost: Before installing the new seat, it’s a good practice to clean the seatpost, especially if there’s old grease or dirt. Wipe it down with a clean cloth. If there’s stubborn grime, a bit of mild cleaner can help.
With your old bike seat removed and the seatpost cleaned, you’re now ready to proceed with installing your new bike seat. This is where the real transformation begins—as you prepare to enhance your riding comfort and performance.
Remember, a properly installed bike seat is not just about comfort; it’s also super important for your riding posture and overall cycling efficiency. A seat that’s too high or too low, too far forward or back, can lead to discomfort, inefficiency, and even injury. So, taking the time to do this right is an investment in your cycling future.
Installing Your New Bike Seat
The installation of your new bike seat is a critical step in upgrading your cycling experience. Here’s how to do it correctly:
- Apply Grease (Optional): If your seatpost is metal, apply a thin layer of grease to it. This helps prevent the seatpost from seizing inside the bike frame, making future adjustments easier. For carbon seatposts or frames, use carbon assembly paste instead.
- Slide on the New Bike Seat: Carefully slide your new bike seat onto the seatpost. Ensure that it’s facing the right direction—the narrower end should be pointing towards the front of the bike.
- Align the Bike Seat: Proper alignment is key for comfort and efficiency. The seat should be centered on the seatpost, not leaning to either side. Most seats also have a scale.
- Adjust the Seat Height: Seat height is super important for efficient pedaling and comfort. A seat that’s too high or too low can cause discomfort and even lead to injury over time. To find the right height, sit on the bike in your cycling shoes. Place your heel on the pedal and pedal backward to the lowest point. Your knee should be slightly bent when your heel is on the pedal. If your leg is completely straight or too bent, adjust the seat height accordingly.
- Tighten the Seatpost Clamp Bolts: Once the seat is properly positioned, tighten the bolts on the seatpost clamp. It’s important to tighten these bolts evenly, especially if there are two. If your clamp has specifications for torque, use a torque wrench to ensure you’re applying the right amount of force. Over-tightening can damage the seatpost or the clamp, while under-tightening can result in the seat moving while you ride.
Adjusting Your New Bike Seat
After installing your new bike seat, it’s super important to fine-tune its adjustments to fit your body perfectly. Proper adjustment is super important for comfort, efficiency, and injury prevention. Let’s dive into the details:
- Adjusting Seat Height: Seat height is vital for efficient pedaling. When your seat is at the correct height, you should be able to pedal comfortably without reaching or rocking your hips. To fine-tune the seat height, follow the heel-to-pedal method mentioned earlier, or consult a professional bike fitter for a more precise adjustment.
- Adjusting Seat Tilt: Seat tilt can significantly impact comfort. A seat that’s tilted too far forward can cause you to slide forward, putting pressure on your arms and hands. Conversely, a seat tilted too far back can cause discomfort in the lower back and groin area. Adjust the tilt so that the seat is level or slightly nose down for most riders. This position helps distribute your weight evenly across the seat.
- Adjusting Fore-Aft Position: The fore-aft adjustment helps align your knees correctly over the pedals, which is super important for efficient pedaling and reducing strain on your knees. Sit on the bike in your normal riding position, and check the knee-to-pedal alignment. Make small adjustments forward or backward until you find the ideal position.
- Rechecking After a Test Ride: After making these adjustments, it’s wise to go for a test ride. Sometimes what feels right when stationary doesn’t hold up under actual riding conditions. Pay attention to any discomfort or strain and adjust accordingly. It may take a few rides to find the perfect setup.
Remember, the goal of these adjustments is to find a balance between comfort and efficiency. It’s normal to revisit these adjustments periodically, especially as you get more accustomed to your new seat or if your riding style changes.
Tips for a Comfortable Bike Seat
Now that your new bike seat is installed and adjusted, here are some additional tips to ensure maximum comfort during your rides:
- Choosing the Right Bike Seat: Not all seats are created equal. It’s important to choose a seat that fits your body type and riding style. There are seats designed specifically for different types of riding, like road cycling, mountain biking, or touring. Don’t hesitate to try out different models to find the one that’s most comfortable for you.
- The Importance of Seat Adjustment: As we’ve discussed, a well-adjusted seat can make a significant difference. Even the best seat won’t be comfortable if it’s not properly adjusted to your body.
- Consider Padded Shorts: For additional comfort, especially on longer rides, padded bike shorts can be a game-changer. They provide extra cushioning and reduce friction and chafing.
- Taking Breaks During Long Rides: No matter how comfortable your seat is, it’s important to take breaks on longer rides. Stand up on the pedals periodically, or take a break off the bike. This helps prevent numbness and discomfort.
- Stay Hydrated and Adjust as Needed: Always stay hydrated during rides, as dehydration can exacerbate discomfort. Also, don’t be afraid to make minor adjustments to your seat as you ride more. Your preferences might change as you get more comfortable with cycling.
Conclusion
Upgrading and adjusting your bike seat is a surefire way to enhance your cycling experience. Not only does it boost comfort, but it also improves your riding efficiency and can prevent injuries. By following the steps outlined in this guide, you can ensure your new bike seat is installed and adjusted perfectly for your needs.
Remember, the journey doesn’t end here. Continue to tweak and adjust as you ride more, and always listen to your body. If you’re looking for more tips, gear, or guidance on your cycling journey, be sure to visit Refried Cycles. Happy cycling, and enjoy the ride on your newly equipped bike!